Configuration of Lead Escalation Processes with Flow Builder in Salesforce
Flow Builder – as a Salesforce administrator, I don’t know many things frightening me as much as Flow. To be honest, I also found visual flows very confusing and inscrutable at first. But I changed my mind now. The visual flow can do so much more than a Process Builder Flow. And if you manage to implement complex requirements without using code, you can proudly pat yourself on the back for having done it on your own, as a Salesforce Administrator without a developer background.
That brings us directly to the biggest advantage of Visual Flows. With the help of a small How-To-Guide, the customer can also make changes independently afterwards. And this maintenance option is a big plus for most Salesforce users.
But let’s get to the really interesting part of this blogpost. As the headline already suggests, you as a reader certainly want to find out how to use a visual flow to recreate an escalation process for leads. Here we go!
Recently, we set up a lead management process in Salesforce and Pardot for one of our customers. Of course, these leads should be processed further after they reach Salesforce in order to become real sales opportunities in the best case scenario. Unfortunately, this is not always the case and therefore we need escalation rules that trigger an alarm message for forgotten leads. We know that Salesforce provides escalation processes as a standard. But these cannot be used for leads. Due to the complexity of the requirements in our specific business case, we decided to implement a Visual Flow using the Flow Builder.
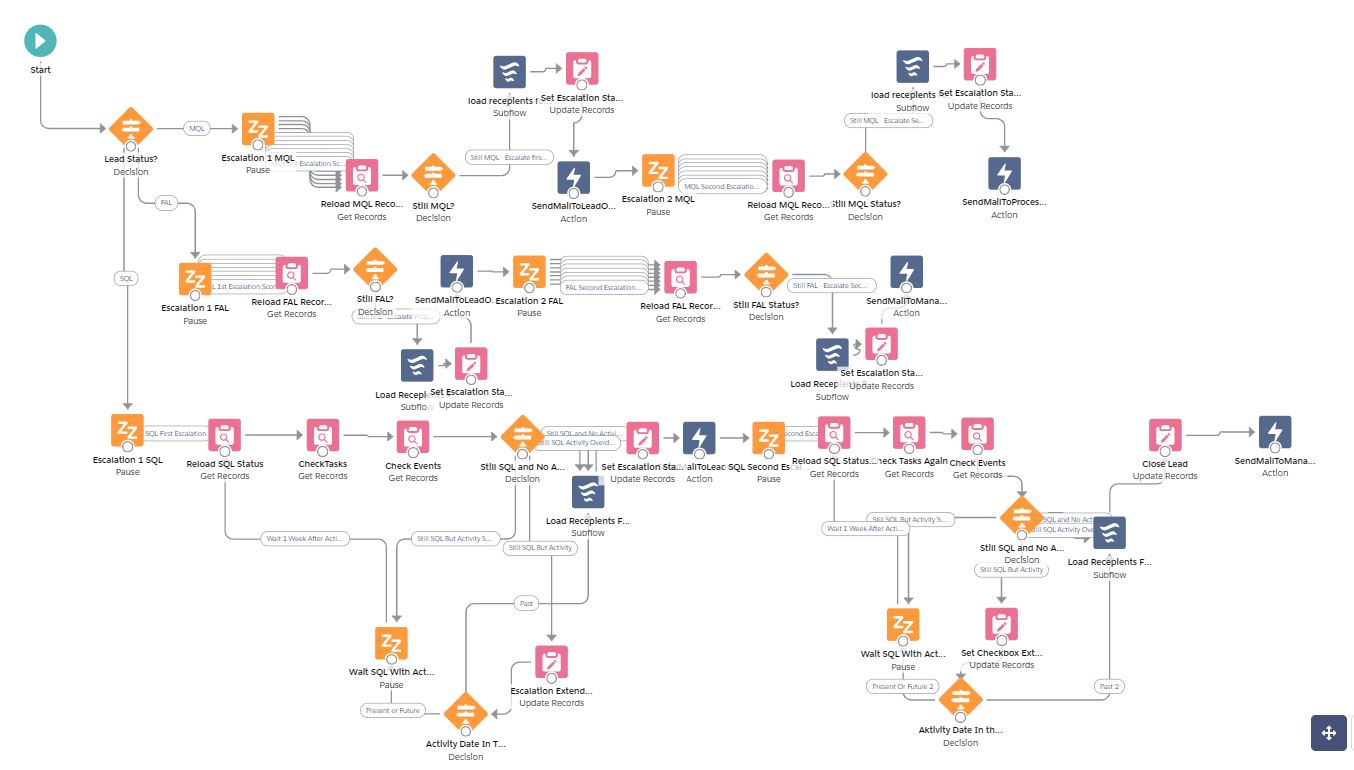
Boom! And here it is. At least this is the core process. As some of you may have already seen, there is another subflow integrated. But one step at a time.
The flow shown above is an autolaunched flow triggered by a Process Builder. When the status of the lead changes, the Process Builder Flow is triggered and the entire lead record is transferred to the visual flow.
First of all, we have a three-stage escalation process here. This means escalating the lead in three different ways depending on the status values. So each horizontal path shown above is a separate escalation process.
Let’s take a look at the first escalation stage.
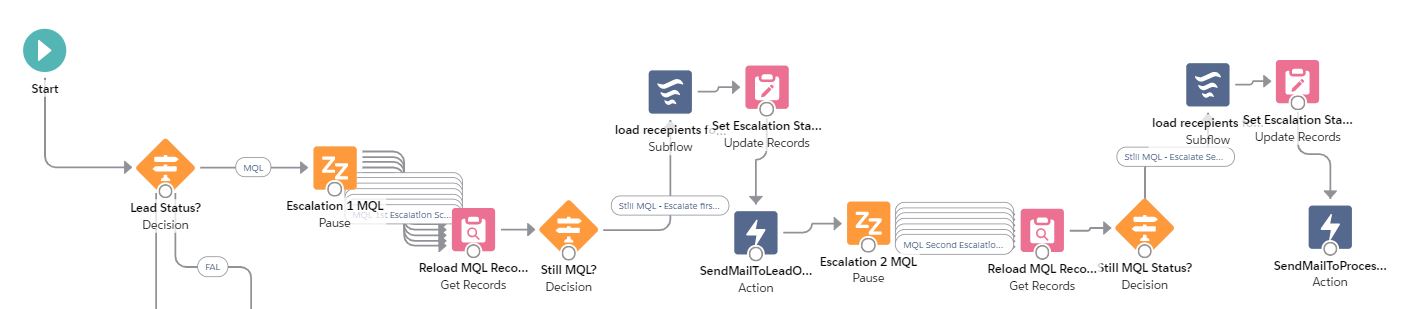
The first step is to check whether the lead record has the status MQL (marketing qualified lead). If this is the case, the lead record is transferred to the first waiting element. Now it gets exciting: Most companies only want to escalate during their business hours. It would be counterproductive if the reminder e-mail to a sales employee ended up in the mailbox on a Saturday and the superior was informed about his or her inactivity on Sunday already, even though the employee did not have to work at all on the weekend. This means we need to make a distinction according to the day of the week. In this escalation step, we have agreed on one working day as the escalation-wait-time with the customer. This means that the waiting time is adjusted to every single weekday.
This can look like the following:
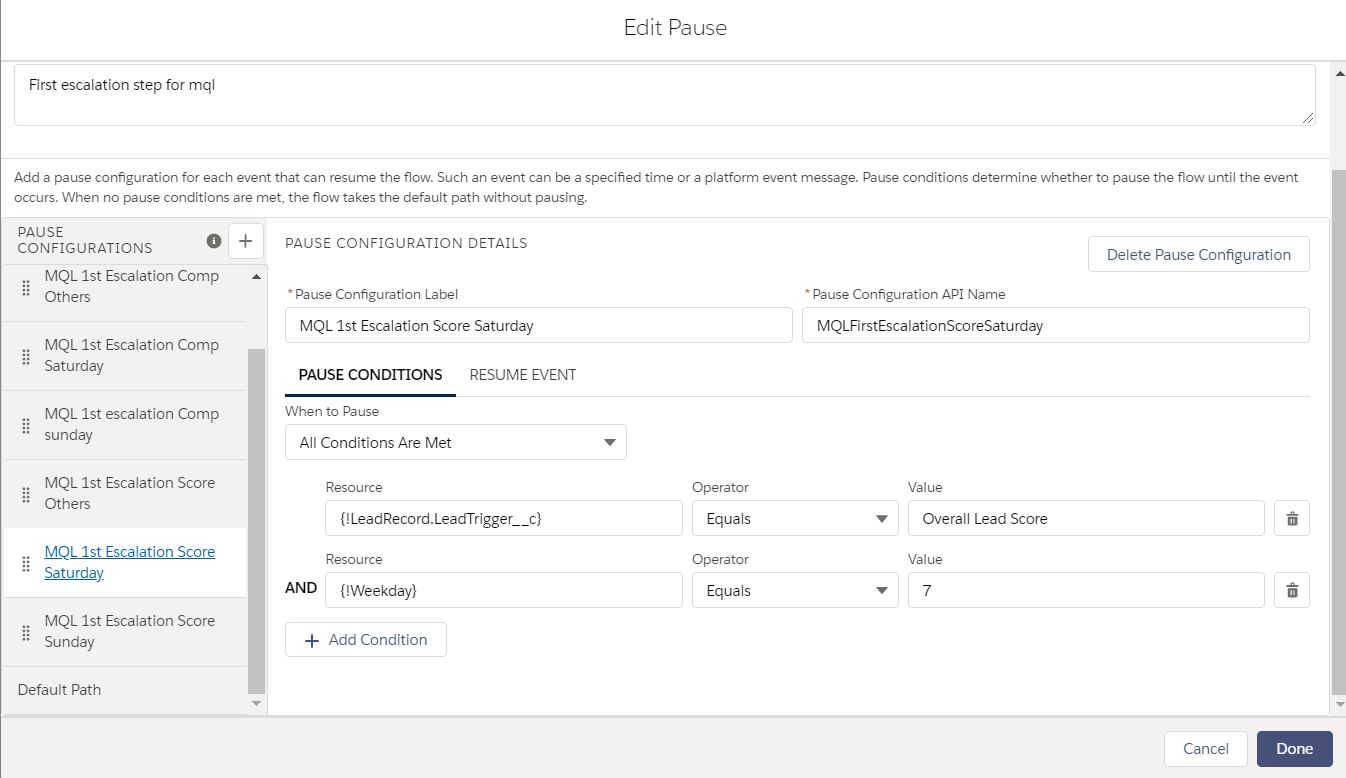
This configuration queries whether the record starts the escalation process on the 7th working day (Saturday). There is also a difference in the waiting time, depending on the reason for the lead transfer from marketing to sales (called lead trigger in this example). In our case, we distinguish between leads that request something actively and leads that have evolved over time through marketing automation.
We set the waiting time as follows:
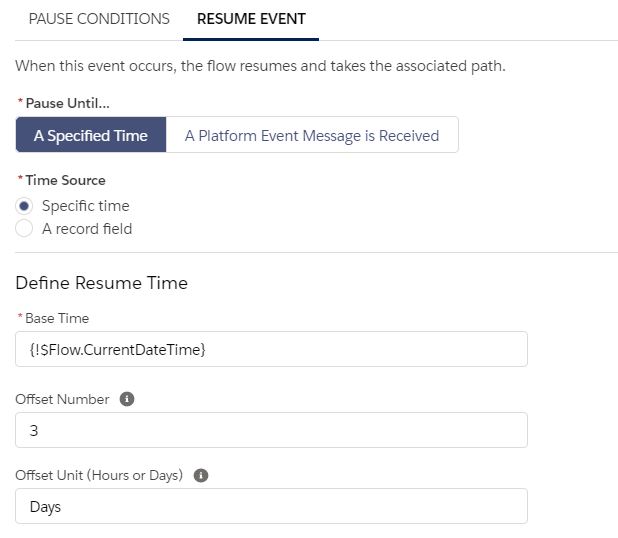
The current time is defined as the starting point and the waiting time is set to 3 days. Why 3 days and not 1? Because in this case we got the lead on a Saturday. We assume that the employee will have the opportunity to view the new lead for the first time on Monday. With a defined escalation time of one business day, the lead should escalate for the first time on Tuesday.
Thus, on Tuesday the lead will reach the next step within the flow.
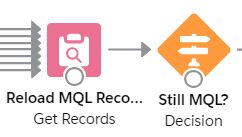
Here, we reload the record, because some data might have changed by Tuesday. Our most important indicator is the lead status, therefore we ask in the next element whether the record is still in MQL status. If the lead record has a different status value due to processing and development by a sales employee, the lead record falls out of this escalation process and is not escalated further (unless another process is triggered). However, if it is still in MQL status on Tuesday, the first escalation mail is sent.
This happens in the following step:
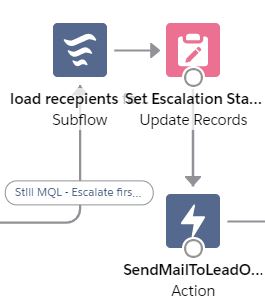
First, a subflow starts that loads the necessary recipients into a list depending on the current escalation level. The recipients are loaded into a list by a subflow, because the recipients vary dependent on many factors. Within the element „Update Records“, we update a field on the lead record to reflect the escalation level. The mail is sent using the recipient list of the subflow and simultaneously a corresponding text template is selected.
That’s it!
The first escalation mail has been sent. Now the whole procedure starts all over again, depending on the complexity of your own individual escalation process.
Have fun trying it out and don’t despair if it doesn’t work at first. We at APTLY are the new generation of a management consulting agency and combine business consulting, technological know-how, software development, marketing expertise and creation into one. If you need Salesforce support, feel free to talk to us!